Managing Roles and Permissions
This page walks through the administrative tasks: creating roles, setting their permissions, and assigning users. For the concepts behind these screens, read the Permissions Overview first.
Every task on this page requires a role that can manage roles — normally Admin. If you do not hold one, the Add a Role and delete buttons are disabled, with a tooltip explaining that only admins can create or delete roles.
Opening the roles list
Go to Settings → Roles. The Roles List shows every role in your organization with its description and the users assigned to it. You can search by name and sort the list to find a role quickly.
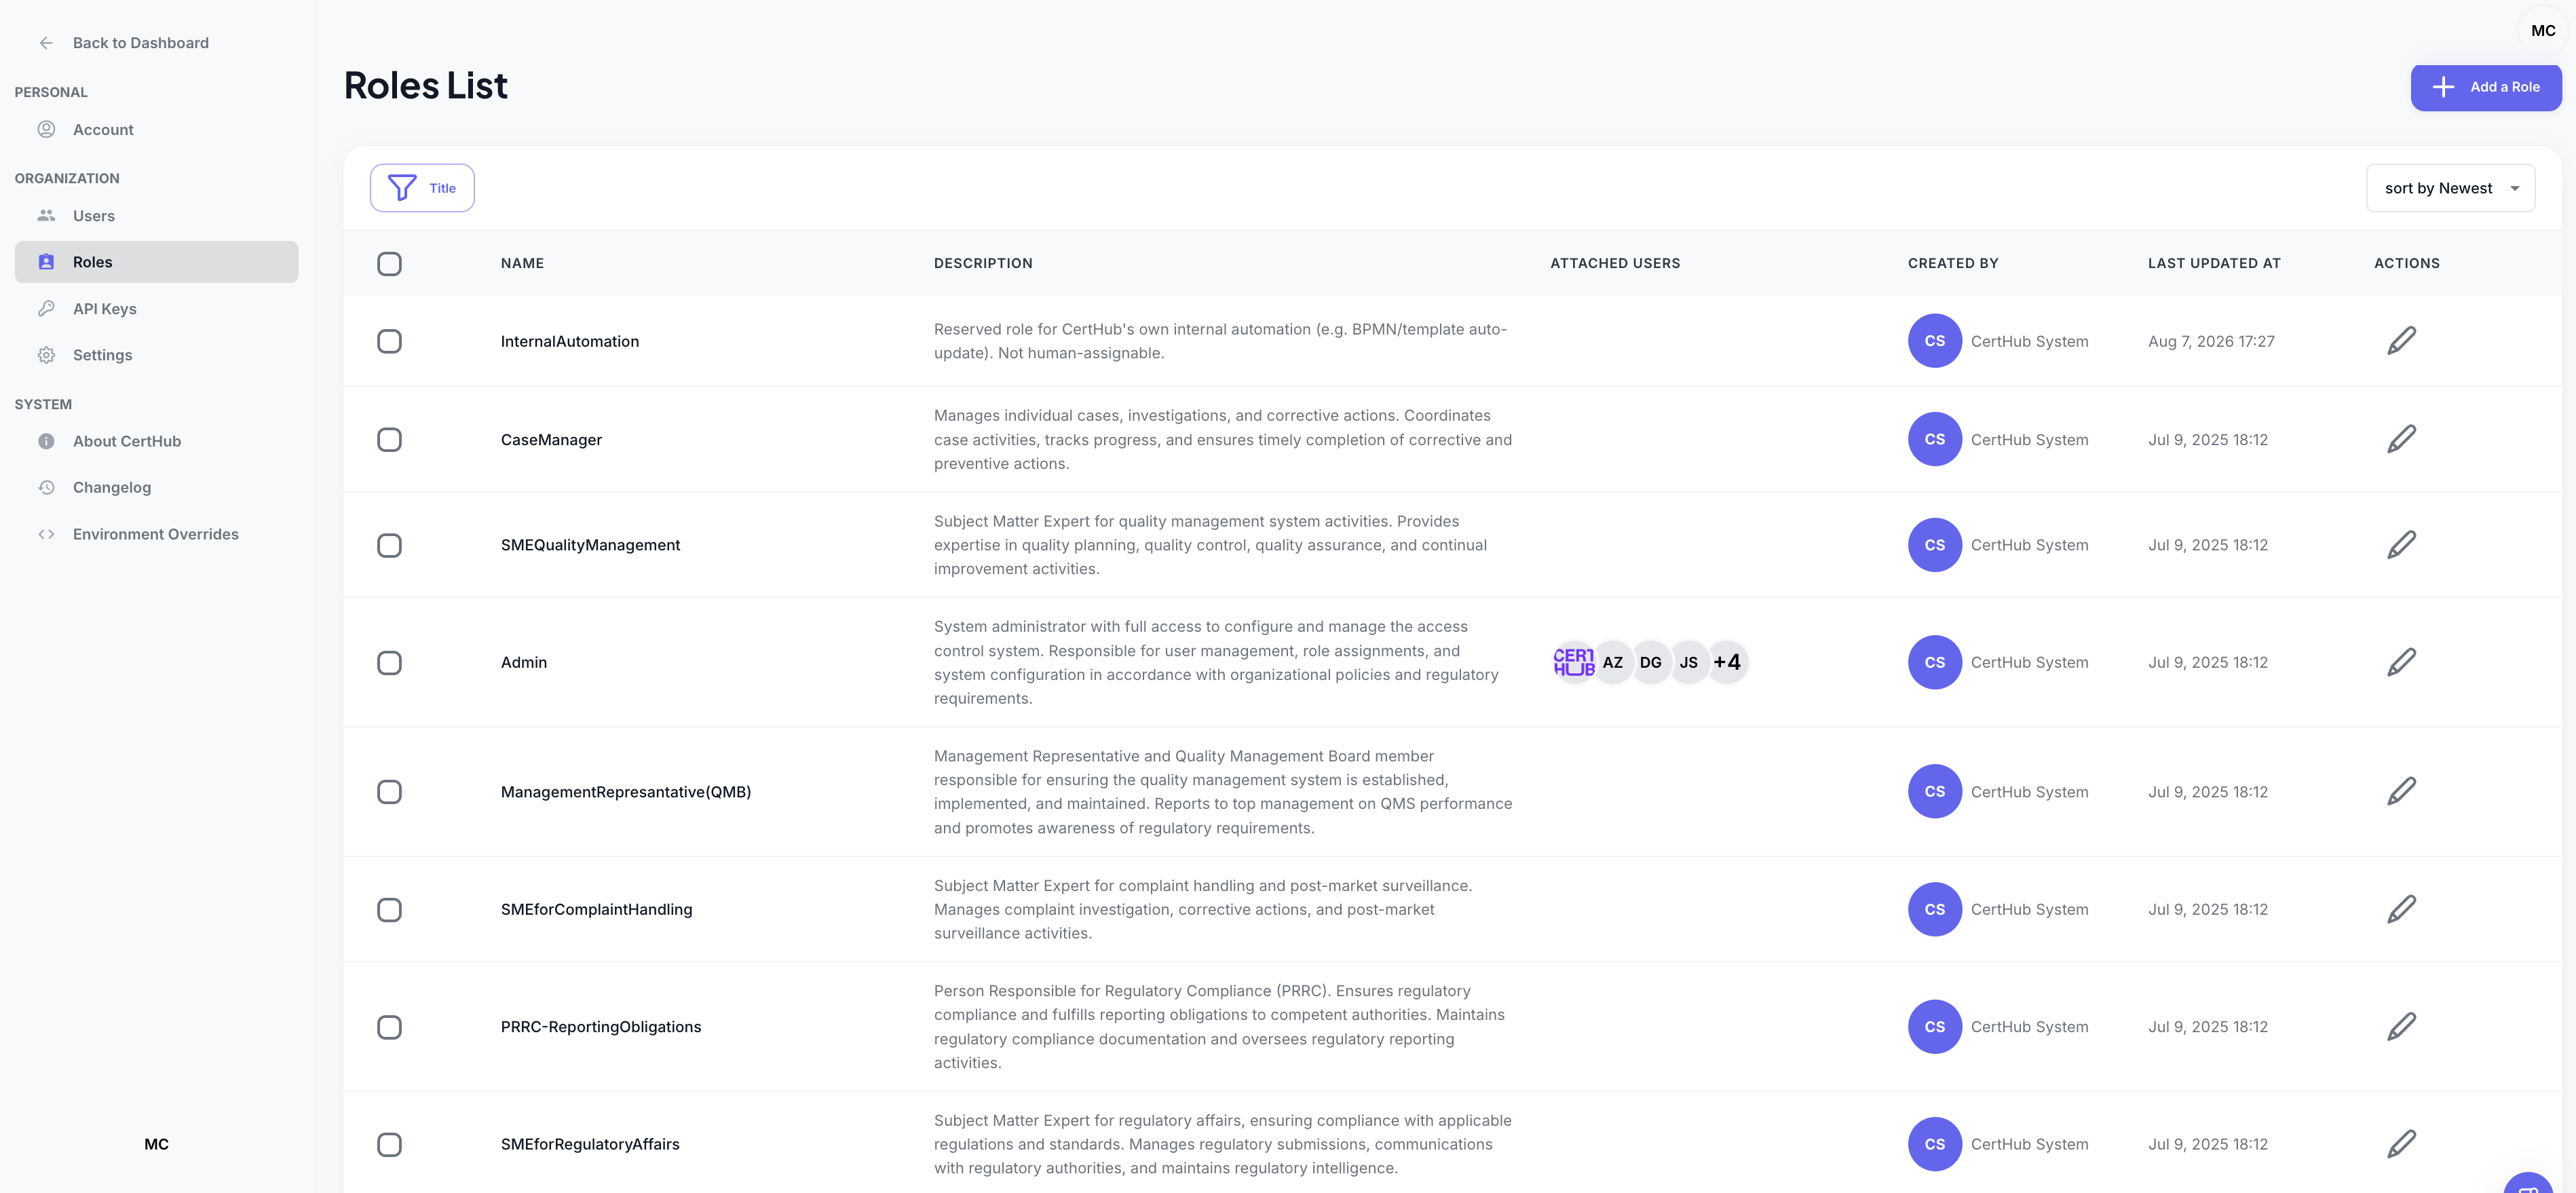 Figure 1: The Roles List, showing the roles defined in your organization
Your organization starts with a set of predefined roles covering common medical device quality management functions. These are listed in the Role Reference. You can edit their permissions, rename them, and assign users to them — they are ordinary roles, not fixed presets. A role marked with a System role badge is one CertHub created during setup.
Creating a role
-
Click Add a Role in the top-right corner of the Roles List.
-
Under Role Data, enter a Role Name and a Role Description.
Write the description as if for an auditor: state the function the role represents and why it holds the permissions it does. The description is shown in the Roles List and is the only in-product explanation your colleagues will see.
-
Under User Assignment, select the users who should hold this role in the Assigned Users field. You can leave this empty and assign users later.
-
Under Access Modules, tick the permissions the role should grant.
A new role grants nothing until you tick somethingEvery permission starts switched off, including Read. A role saved with no permissions ticked can do nothing at all, and a user whose only role is that role will be locked out. This is intentional — permissions are opted into deliberately — but it does mean an empty Access Modules section is a mistake rather than a default.
-
Click Add.
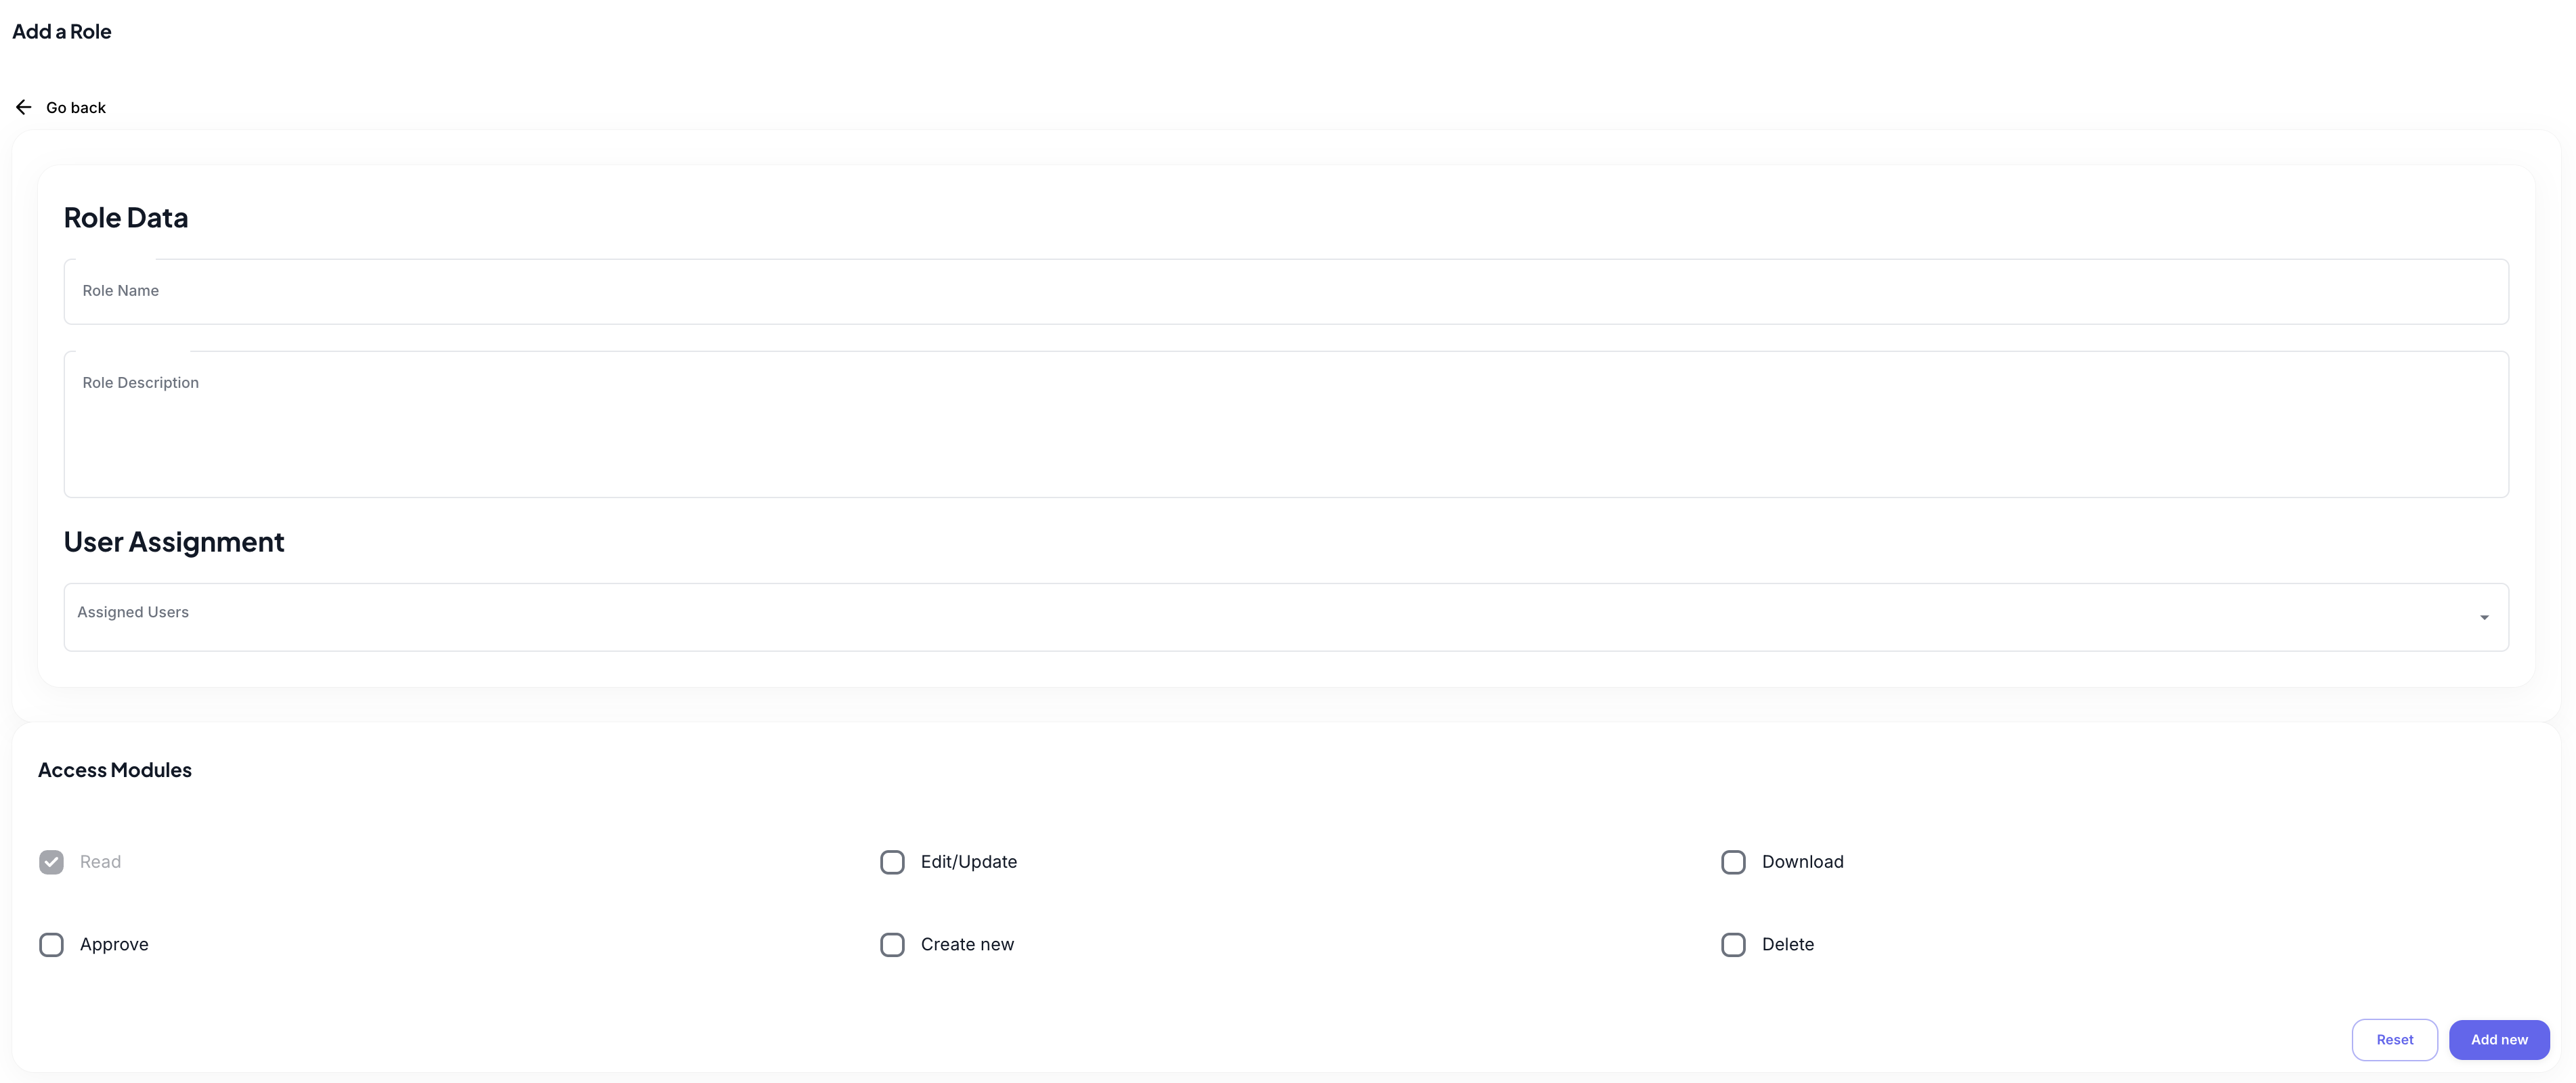 Figure 2: Creating a role — the six permissions appear under Access Modules
Changing a role's permissions
- In the Roles List, click the edit action on the role.
- Adjust the checkboxes under Access Modules.
- Click Save.
Changes take effect for every user holding the role. There is a short delay — normally well under a minute — before the change is enforced across all of CertHub, so a user who is mid-session may briefly still be able to do what you have just revoked.
Removing a permission takes it away from everyone holding the role, with no warning to them. Before narrowing a widely-held role, check the This Role is used by panel in the role's detail view to see who is affected.
When you edit a role, the detail view also shows who created it and who last changed it, with timestamps.
Assigning users to roles
You can work from either direction:
- From the role — edit the role and add or remove users in the Assigned Users field. Use this when onboarding several people into the same function.
- From the user — open Settings → Users and change the roles on that user. Use this when one person's responsibilities change. See Application Settings & User Management.
A user can hold several roles, and their permissions are the union of all of them. Assign a second role to add permissions; remove a role to take permissions away.
 Figure 3: Assigning users to a role
Deleting a role
- Select one or more roles using the checkboxes in the Roles List.
- Click the delete action and confirm.
Deleting a role removes its permissions from everyone who held it. A user left with no roles at all loses all access, including read — so check the This Role is used by panel first, and give affected users another role if they still need access.
Deleting a role permanently removes it and its associated data. Recreating a role with the same name does not restore its previous assignments.
CertHub will refuse to delete the last role that can manage roles, so that your organization cannot lose the ability to administer its own permissions.
Designing your role set
A few practices that keep a permission model auditable:
Model functions, not people. A role should describe a job — Risk Manager, SME for Production — so that it stays correct when staff change. Roles named after individuals have to be rewritten every time somebody moves.
Separate authoring from approval. Giving one role both Edit and Approve lets the same person write and sign off their own work. Where your quality management system requires review by a second person, use separate roles and rely on approval workflows to enforce the sequence.
Grant Delete sparingly. Most quality management functions never need to delete anything; superseding a document through versioning is the auditable equivalent and preserves history.
Treat Download as a distinct decision. Download controls export of content out of CertHub. Where the content is confidential, decide it on its own merits rather than granting it alongside Read by habit.
Prefer combining roles over creating variants. Because permissions accumulate, a user who needs the permissions of two functions can simply hold both roles. Creating a merged role duplicates a matrix you then have to maintain in two places.
Checking your own permissions
CertHub greys out actions you cannot perform, so the interface reflects your permissions as you navigate. If a button is unexpectedly unavailable, or you see "No access assigned. Contact your administrator" or "You do not have write access", the cause is almost always one of:
- You hold no roles. Ask an administrator to assign one.
- None of your roles grants that permission. Permissions come from roles only, so the fix is a role change, not an exception for your account.
- The permission was recently changed. Reload the page to pick up the current state.
Administrators can confirm what a user actually holds by opening that user in Settings → Users and checking the roles listed against the Role Reference.